Friday, February 17, 2012

Hello there!

Remember me?

Thank you so much for your inquiries. I have had numerous e-mails wondering where I have been! You all are very kind to ask. I recently took a full time position as Education Coordinator at City Arts Center here in OKC. It has taken me a little time to adjust to working full time. I love my job! We are doing all sorts of exciting things and you can count on me to return to blogging very soon with wonderful, creative ideas for you to make with your children and students. I hope you all are well. Live creative!


Sunday, September 25, 2011

Cupcake Collage

I have been creating all sorts of cakes recently with children at the OKCMOA to celebrate the new exhibition, Poodles & Pastries (and other important matters): New Paintings by Franco Mondini-Ruiz. We are taking inspiration from his paintings and sculptures to create our own unique works using different mediums.

Yesterday we focused on collages in a class for 3-5 year olds and in Drop-in Art where children of all ages come to create.

In the class we talked about sweet treats, especially cupcakes! We visited the gallery to view the new works and read the book, If You Give a Cat a Cupcake by Laura Numeroff.
We shared our favorite paintings and talked about our favorite type of cupcakes.With all of this information in mind we headed back to the classroom to cut, tear and glue our own cupcake creations.

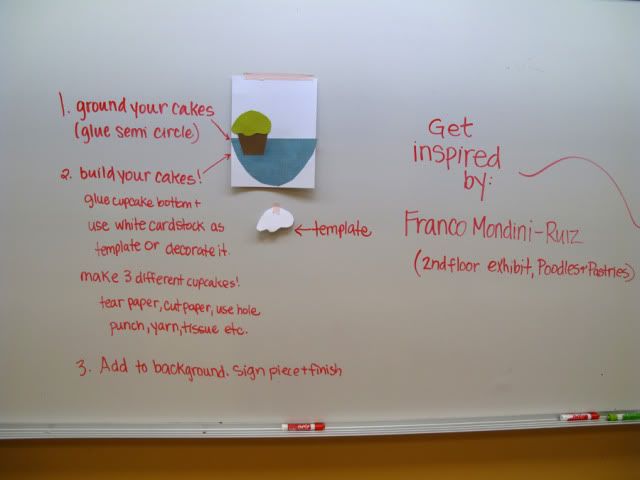
We went over our steps but I have reminders on the board.

Photobucket

Supplies are ready to go:
Photobucket

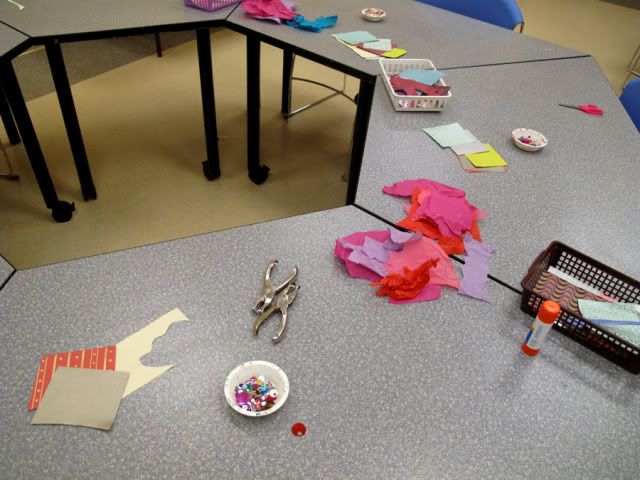
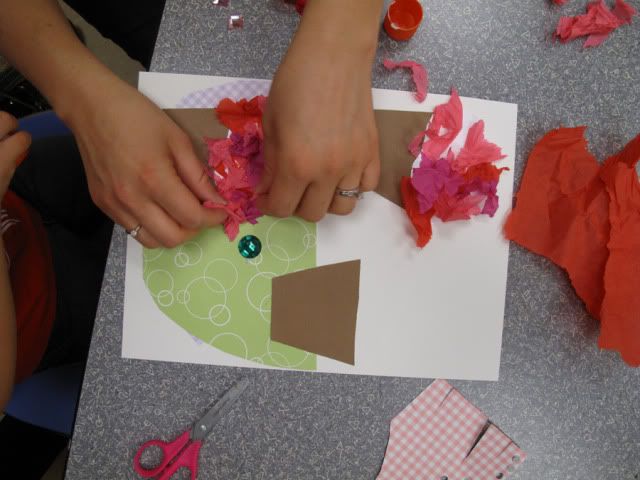
Tables were supplied with baskets full of scrap paper, tissue paper, sequins, hole punches, glue sticks, yarn, scissors, background paper, 3 pre-cut cupcake bottoms and 3 icing tops. I explained that the tops for the icing could be covered and decorated or used as a template to trace on scrap paper and then the scrap paper could be cut out and used.

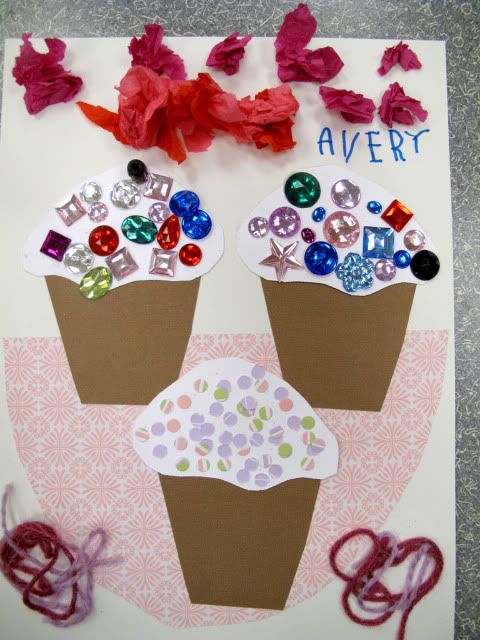
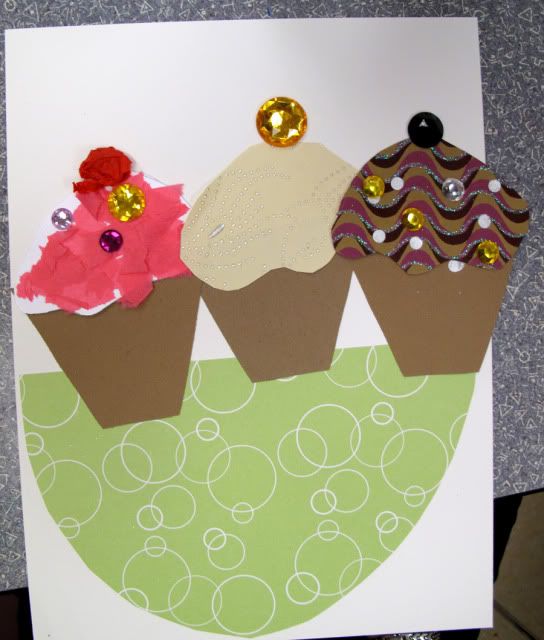
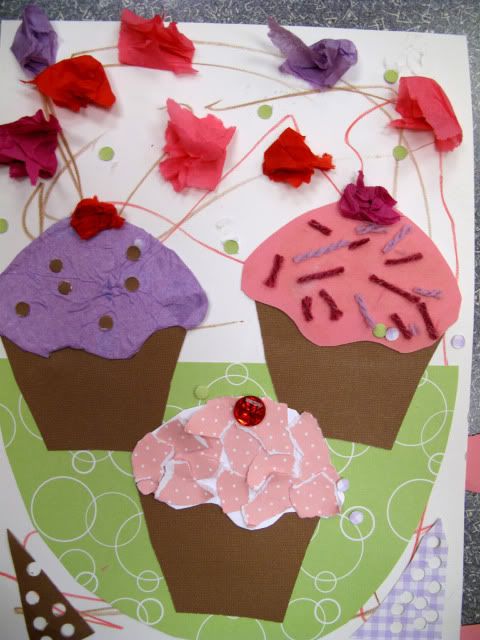
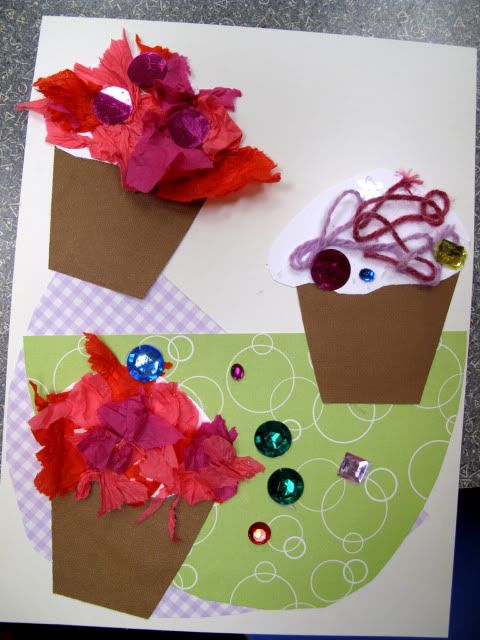
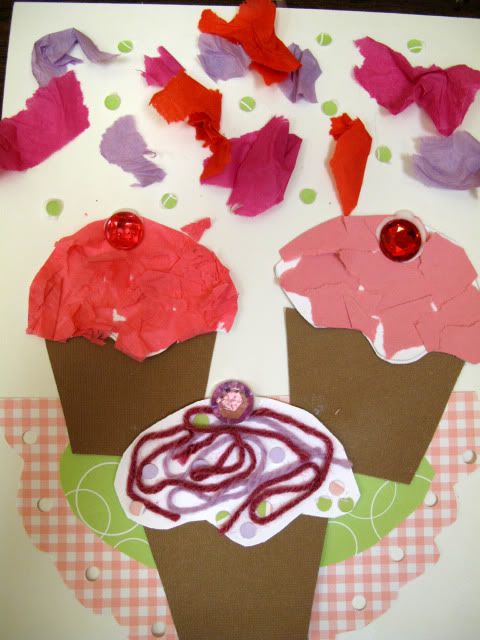
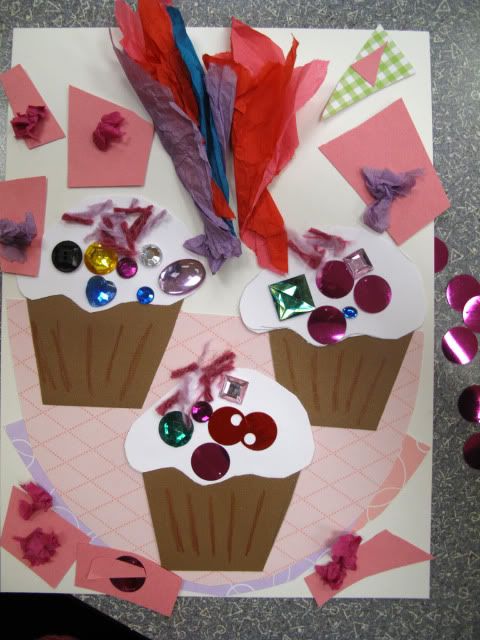
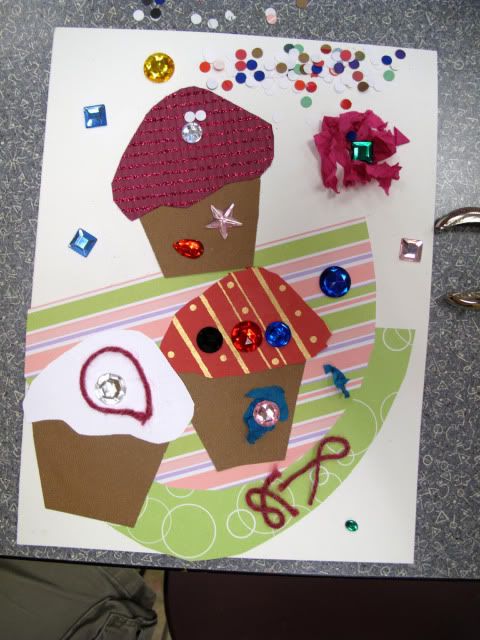
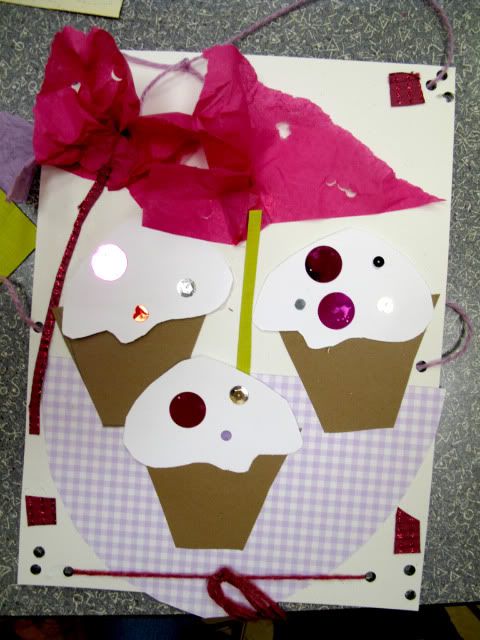
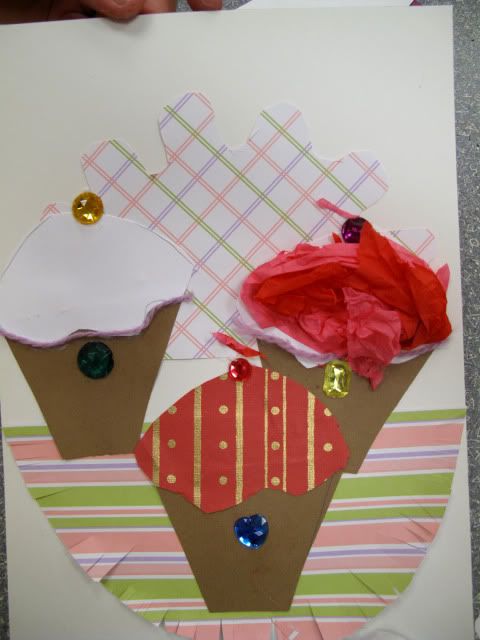
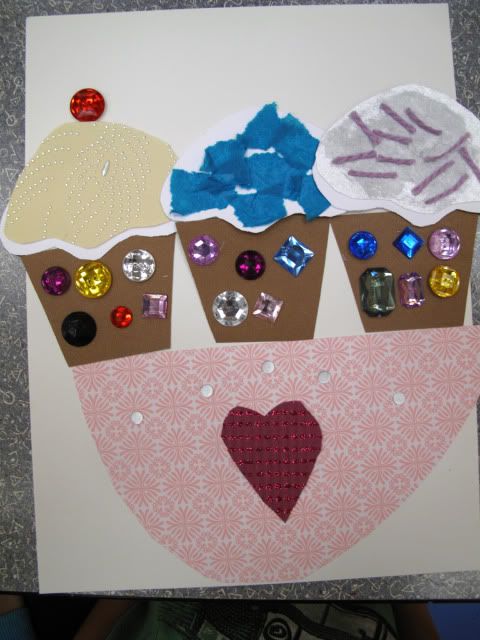
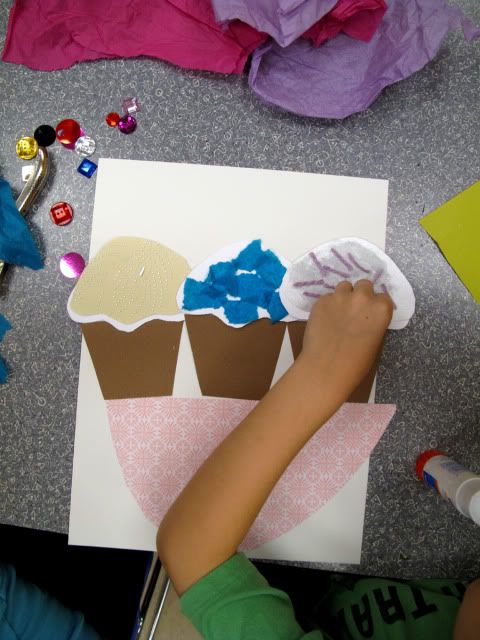
The children were instructed to decorate all 3 cupcakes differently. I think we succeeded! So much fun!

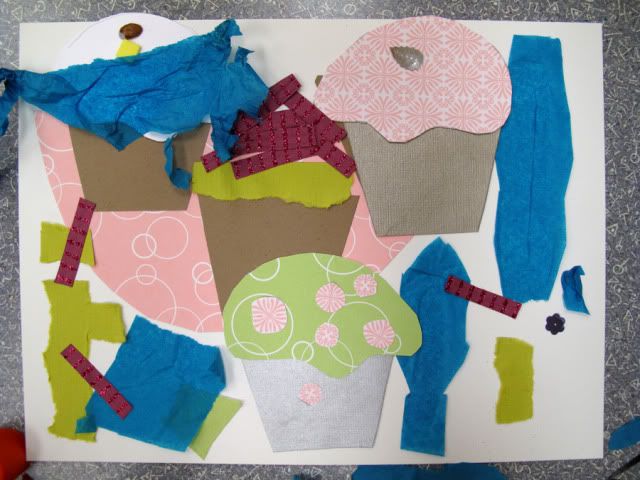
First ground our cupcakes with a semi circle. Then glue cupcake bottoms:

Photobucket

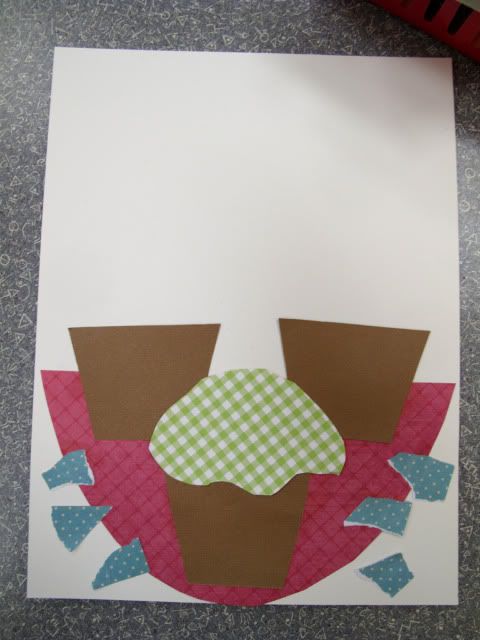
Now we start to top our cupcakes and decorate our papers!

Photobucket

Photobucket

You will need:
-9x12 heavy paper for background (we used tagboard)
-Various scrapbook papers
- Brown cardstock for cupcake bottoms (I pre-cut)
-White cardstock for icing tops  (I pre-cut)
-Tissue paper
-Scissors
-Hole punches
-Glue Sticks
-Yarns, sequins,other embellishments

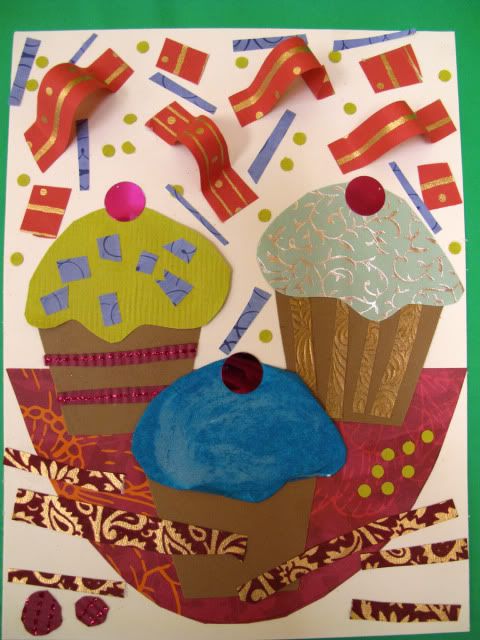
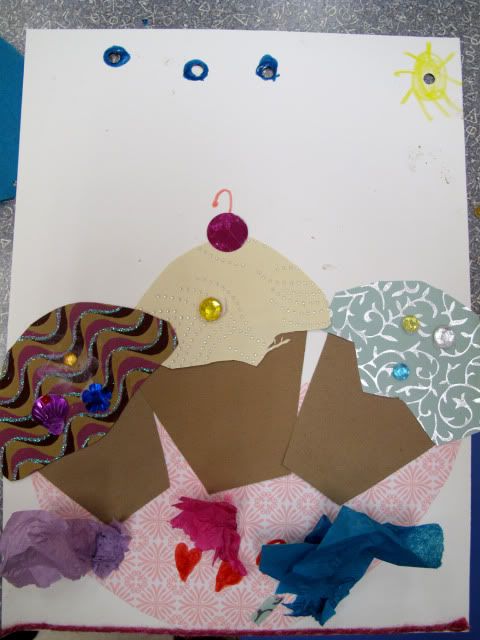
Here are some of our finished creations! Are you hungry yet? :)

Photobucket

Photobucket

Photobucket

Photobucket

Photobucket

Photobucket

Photobucket

Photobucket

Photobucket

Photobucket

Photobucket

Photobucket

Photobucket

Sunday, August 21, 2011

Big Bugs

I created "Big Bugs" with children of all ages at the OKCMOA recently for Drop-in Art. We focused on symmetry, line and pattern.

First we looked at examples on the board of symmetry. We also looked at bugs and parts of a bug's body which includes a head, thorax and abdomen.

To get started we fold our large drawing paper in half and use a black oil pastel to draw HALF of our bug's body. We draw the body parts and add other things like legs, wings, antennae, patterns and designs to create our own unique bugs.

We FOLD the paper closed and rub all over our design. This will transfer the oil pastel using the heat of our hands to the other side of the paper and give us perfect vertical symmetry. Now we go over those light lines with our black oil pastel to make it complete.

Photobucket

Photobucket

Photobucket

Photobucket

Now we jump into paints. For this project we used Crayola washable tempera paints. The kids really enjoyed watching their creations come to life through color! This project is very adaptable for different ages.

Photobucket

You will need:
-Big white drawing paper
-Black oil pastel
-Tempera paints, brushes, washout bowls
-Examples of bugs and symmetry

Photobucket

Photobucket

Photobucket

Photobucket

Photobucket

Photobucket

Photobucket

Photobucket

Photobucket

Photobucket


Monday, August 8, 2011

Farm Land


Little ones ages 3-5 years old joined me at the OKCMOA for a fun filled class about farms. We were taking a look at farms because of the current exhibition, 1934: A New Deal for Artists. We began the class by taking a look at a small slideshow I put together of real farm landscape photos. We looked at the layers of color and line.

We also talked about farms and why the land on farms is so important. We talked about crops and our favorite grown foods.

To create our beautiful farm landscapes we began by cutting a piece of paper into 4 pieces.

Photobucket

Now we use a paintbrush to paint the pieces yellow, green and brown.

Photobucket

The top section of our paper is the sky and we painted our sky blue with cotton balls and used those cotton balls to make white clouds in the sky.

Photobucket

We visited the gallery while our paint dries. We sat in front of farm paintings and I read the book, Mrs. McNosh and the Great Big Squash.

We return to the classroom and use our glue sticks to put our crops together on a piece of colored construction paper. I compared it to a puzzle, getting the pieces to match up. Now we finish our farm land by adding some details with more paint and q-tips. We add lines and dots and finish them up!

Photobucket

You will need:
-White paper
-Tempera paints/brushes
-Q-tips
-Cotton balls
-Construction paper
-Scissors
-Glue stick

Photobucket

Photobucket

Photobucket

Photobucket

Photobucket

Sunday, August 7, 2011

City Prints

Children of all ages joined me recently at the OKCMOA to learn about printmaking. This fun art project had us painting and printing our hearts out.

First we used watercolors to create the backdrop for our cities. We painted the top half of our paper with warm colors to represent the sky and the bottom half with cool colors to represent water.

Photobucket

Photobucket

We set our papers aside to dry and move to our next step.

Now we draw our city design on printing foam. We used a pencil to press firmly into the foam leaving the valleys that will be our lines when we print.

Photobucket

Now cut your city outline out of the foam and get ready to print. We used Speedball ink to load our brayers and spread a thin about of ink on our city.

Photobucket

Photobucket

We line up our city on the top half of our watercolor paper and press all over the backside of the foam. Carefully lift to reveal your first print.

Photobucket

Now we use the same piece of foam without re-inking and press to create a print on the blue portion or reflection of our city. Carefully lift and you are finished! Make as many prints as you like!

Photobucket

LinkYou will need:
-Scratch-Foam Printing board
-White paper
-Watercolors, brushes, wash bowl
-Pencil
-Scissors
-Printing ink, brayer and plexiglass

Photobucket

Photobucket

Photobucket

Photobucket

Photobucket